Extra garbanzo beans led me to putting this salad together.
Ingredients:
Salad:
1 cup dry quinoa prepared and cooled (Rinse the quinoa, toast with some olive oil in the pan before adding 2 cups of water. Bring to a boil and then simmer for 15-20 minutes, or until water is absorbed)
1 cup garbanzo beans (rinsed if using canned)
1/2 yellow bell pepper, diced (seeds removed)
1/2 red bell pepper, diced (seeds removed)
1/2 poblano pepper, diced (seeds removed)
4 radishes, thinly sliced and halved
1/3 small red onion, diced
1 large carrot or 8-10 baby carrots thinly sliced
Place all ingredients in a large bowl, top with vinaigrette and toss. Add salt and pepper to taste. Serve immediately or refrigerate for a few hours or overnight to allow the flavors to combine.
Sweet and Spicy Citrus Vinaigrette:
Juice of one lime
Juice of one tangerine/orange
2 tablespoons apple cider vinegar
2 tablespoons honey
1/4-1/3 cup olive oil
2 teaspoons sriracha sauce
1- 1 1/2 teaspoons salt
1/2 teaspoon pepper
1/4 teaspoon garlic powder
Place all ingredients in a small jar and shake for about one minute.
Monday, December 31, 2012
Roasted Garlic Hummus
I prepared dried garbanzo beans to use. I put a couple of cups of dry beans in water to soak over night and then cooked them for about 1-1.5 hours, until they were tender. The result was more than the 3 cups I used in the recipe, I used the rest for a Quinoa Salad. Some recipes I saw called for using canned beans (which I have used and are great) as well as using their liquid instead of water. To each their own, but I wouldn't suggest using the liquid. The sodium content is super high and I'm sure there are plenty of additives in the liquid that shouldn't be there. I always rinse canned beans as well. This recipe yielded about 30 ounces.
Ingredients:
3 cups garbanzo beans
5 cloves roasted garlic (leave the skins on while roasting- 300/350 degrees for 15-20 minutes)
2 tablespoons tahini
1/2 cup lemon juice
1/2 cup olive oil
1-2 teaspoons of salt (to taste- it depends if dry or canned garbanzo beans are used)
2-4 teaspoons sriracha sauce (to taste)
1/2-1 cup water
Directions:
Place all ingredients (except for all of the water) in a blender or food processor. Blend until really smooth, adding the water during the process until the desired consistency is reached. Serve with pita, veggies or whatever you like to eat hummus with.
Thursday, November 29, 2012
Life
So...I've been super busy recently. It hasn't really slowed down my cooking, I just haven't had time to post anything. I'll be out of the country for a couple of weeks but I hope to put some of the things that I've tried up when I get back, before tax season starts. To be quite honest, it's surprising how many people have looked at this blog. I originally started it as a place to put recipes I like and access from anywhere, hence the name. I don't mind though, I think it's cool, so keep on looking!
Saturday, October 13, 2012
Roasted Vegetable Tomato Soup
A simple roasted vegetable soup. I served this with Chipotle Gouda Goetta Macaroni and Cheese.
Ingredients:
1 onion quartered
2 cloved of garlic in their skin
3 fresh tomatoes
1 red bell pepper
2 cans diced tomatoes (I used one that was mixed with chilies)
5 fresh basil leaves
2 tablespoons olive oil
salt and pepper to taste
Directions:
Roast the onion, garlic, fresh tomatoes and bell pepper in a 400 degree over for 20-25 minutes. Once roasted, place the onion, garlic (without skins), tomatoes and bell pepper (seeds removed) in a blender with the two can of tomatoes, olive oil and basil. Blend for a minute or two or until completely smooth. Warm the soup through on the stove.
Friday, October 12, 2012
NYC- Patbingsu- Korean Shaved Ice and Fruit Dessert

7/8/2014 Update: I was in NYC this past week and solved the mystery! The dessert place is called Tous Les Jours and the other restaurant is called KunJip. I highly recommend both of them :)
Chipotle Gouda Goetta Macaroni and Cheese


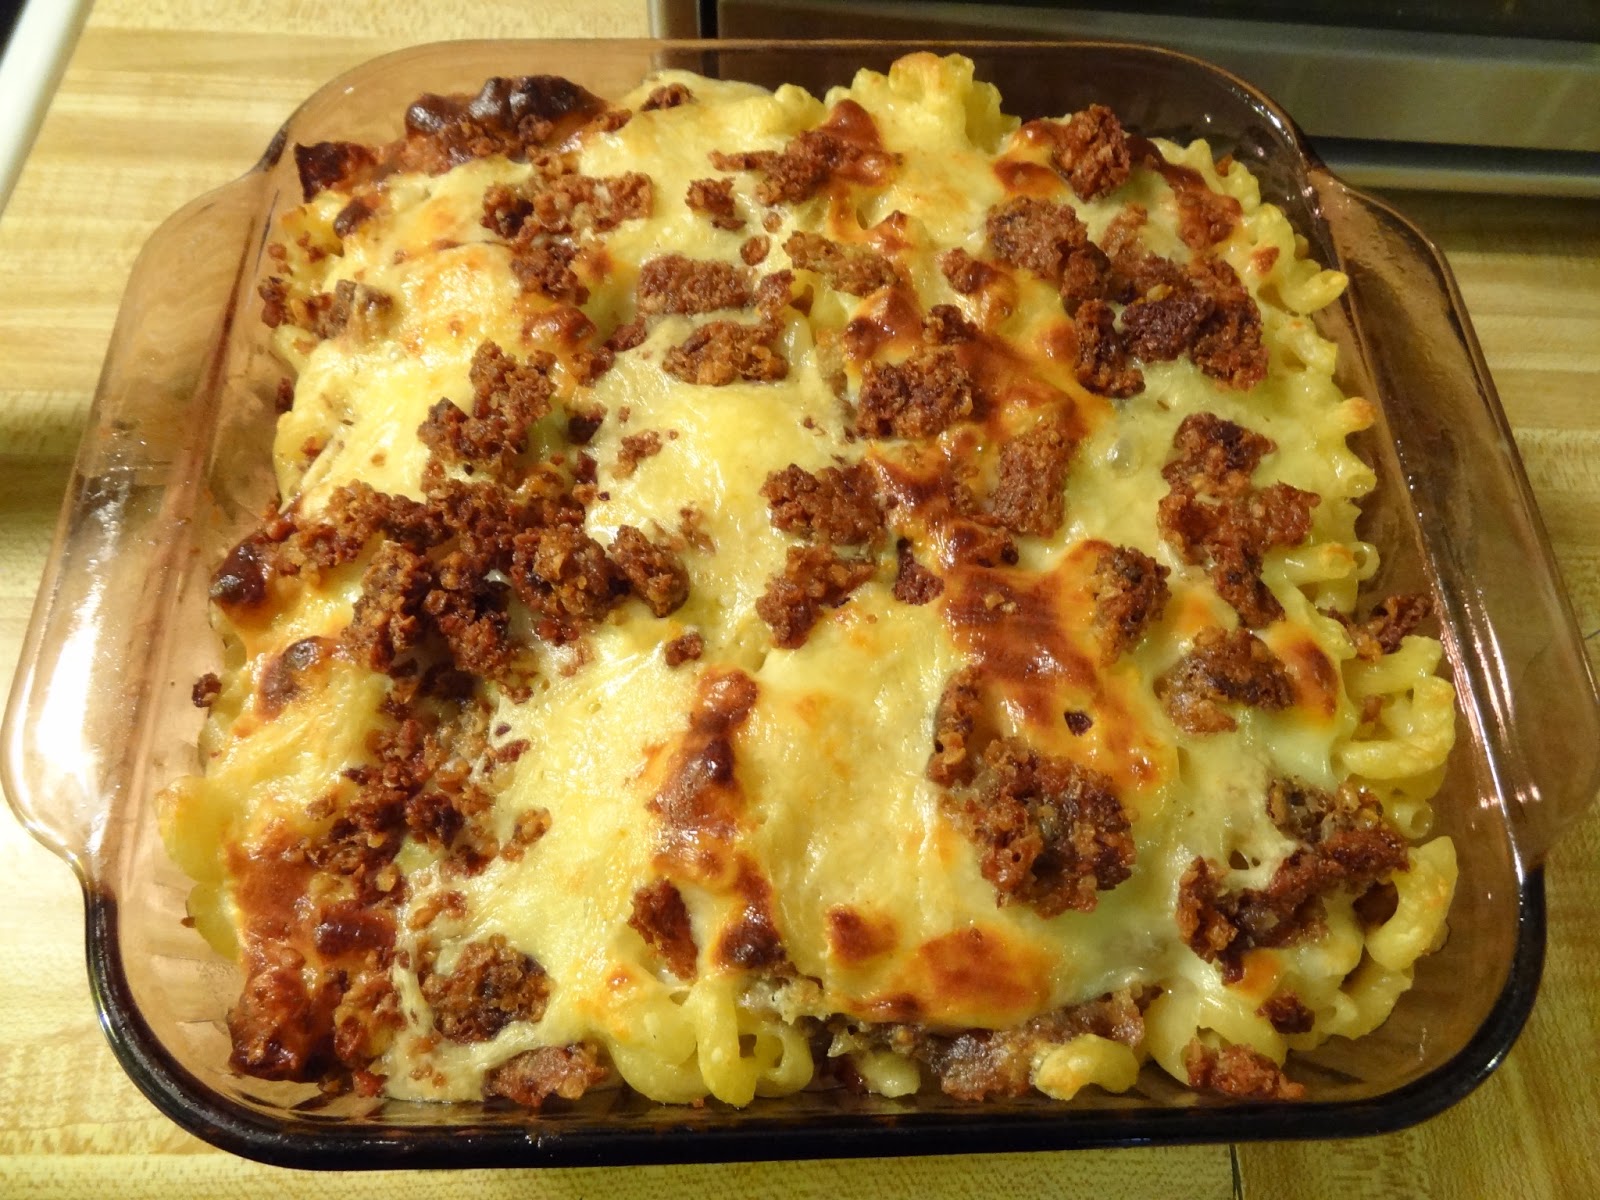

I went to Oktoberfest and a friend bought Goetta Macaroni and Cheese. It was definitely not worth the $4.50 she paid. There was hardly any goetta and what was there was mushy. The mac and cheese wasn't anything to rave about either. I decided to take on the challenge and I think I came up with something that was pretty stinking awesome. It went well with the homemade roasted veggie and tomato soup that I made in my Vitamix along with a glass or two of 3 Blind Moose Merlot (Check out Vinturi's wine aerators. They make an average bottle of wine taste way better. I've never received anything for free from any of these companies, I just like to acknowledge a great product when I find one and warn people when one is a dud.). If you're wondering what goetta is, click here. It may not sound like something that appealing, but give it a shot, it may be your new favorite food. This recipe is not healthy by any means, but it was delicious and my whole family will vouch for that. As for the cheese, I prefer block cheese over pre-shredded cheese, the anti caking powder they put on it messes with the consistency of the sauce.
Ingredients:
3-4 ounces White American Cheese (plus extra for topping)
3-4 ounces Cheddar Cheese
4-6 ounces Chipotle Gouda (plus extra for topping)
8 ounces Glier's Goetta (fried until really crispy and crumbly)
1 cup milk
2 tablespoons butter
10-12 ounces dried macaroni- cooked until al dente
1/2 pinch nutmeg (not much at all, just some for flavor)
1/4 teaspoon garlic powder
1/4-1/2 teaspoon Sriracha hot sauce, depending on individual taste
Directions:
Fry goetta until crispy and crumbly. Boil and cook pasta until al dente. In a sauce pan put all of the ingredients except for the pasta, goetta and cheese for topping. Simmer the ingredients over low heat until melted. In a bowl (or in the pan if large enough) combine the cheese sauce, macaroni and 2/3 of the goetta until combined. Transfer the macaroni to a greased baking dish (9x9 or 10x10) and cover with the reserved cheese and goetta. Bake in a 400 degree oven until slightly golden and bubbly.
Thursday, October 4, 2012
Encebollado de Pescado- Recipe
I just got this recipe from a Cuencana. I don't have time to translate it now and I haven't tried it yet, but I will as soon as I can.
Para 5 porciones necesitas:
1 libra de pescado, puede ser albacora, atún o corvina
sal al gusto
5 dientes de ajo
1 libra de cebolla
6 a 8 limones (al gusto)
3 libras de tomate
3 libras de yuca cocinada
1 pimiento
4 ramitas de albaca
1 plátano verde pequeño o la mitad de un grande
1 taza de culantro picado
3 cucharadas de aceite de olivo
Lavar y Cocinar el pescado con 4 tazas de agua, sal, 2 dientes de ajo,
1/2 cebolla picada, medio limón con cáscara, 1 ramita de albaca,
cocinar solo por 5 a 8 minutos. Cernir el agua y reservar, Sacar el
pescado y desmenuzarlo
Aparte en una olla hacer un caldo con 6 tazas de agua, cuando comienze
a hervir agregar las 3 libras de tomates enteros, 1 cebolla picada en
4 partes, el pimiento sin semilla, el culantro y 2 o 3 ramitas de
albaca. Dejar hervir por 10 minutos,y cernir.
Poner en la licuadora el agua del pescado y agregar el plátano pelado,
licuar y agregarlo al caldo cernido, dejar hervir este caldo por 10
minutos, probar la sal y una vez listo agregar la yuca cocinada.
Aparte hacer una salsa con la cebolla, el jugo de limón, sal y aceite de olivo
Servir colocando primero el caldo o sopa, luego poner el pescado
desmenuzado y por último la salsa de cebolla.
BUEN PROVECHO
Monday, September 3, 2012
My New Addition- Vitamix

To say I've been wanting a Vitamix for the past 5 years isn't an exaggeration. I just couldn't part with $500 for a blender, even though I regularly use the one we have in the family and curse it every time I use it (If anyone tries to persuade you into buying a Montel Williams blender, run in the opposite direction as quickly as you can and don't look back. It's junk and sounds exactly like a chainsaw.). Back to the point, now that my rant is over. The other day I was watching TV and came across QVC. I'm not by any means a TV/infomercial shopper, but I stopped when I noticed they were selling a Vitamix. They have something called a TSV or Today Special Value. They had a Vitamix that retails for over $500 (yes that is a correct retail value, I checked the Vitamix website to verify) on sale for $380 (plus tax) with free shipping. They would even break that purchase into 5 easy payments (This didn't sell me, even though I took advantage of it. I would rather have that money collecting interest than shell it all out at once.). I watched the guys on TV for a few minutes and then turned the channel. I later found myself cruising the QVC website and comparing other sites to see if that was indeed a good deal. It was by far the best one I could find. I took the leap and made the purchase (I ordered the pretty blue one because it matched my new cobalt blue Le Creuset stock pot and tea kettle.). I also ordered the dry blade container so I can grind my own wheat. I've had some wheat berries in my cabinet for awhile now and plan on making some bread. I got that container for about $114 after shipping and tax and it retails for about $150 on the Vitamix site and on other sites. So in total I paid about $510 for a really nice setup. It even came with a 200 recipe cookbook and a silicone spatula. Overall, I am thrilled with my purchase. I placed the order on a Sunday and they said the order would ship halfway into September (about 3 weeks away). I ended up getting it all on the Friday after it was ordered. I didn't get an email notifying me that it was being shipped, but I'm over that now. I used it for the first time today and it's awesome. My breakfast smoothie was more smooth than the other blender could ever get it. The Caesar dressing I made turned out awesome and the milkshakes we made after dinner were pretty stinking good too. So, after all that rambling...if you're looking for a new blender you should seriously consider a Vitamix. It's an investment, but it's totally worth it. It also comes with a 5 or 7 year warranty- if that makes it any easier. Below is the link to the one I purchased and the Vitamix site. Think about it ... what are you waiting for, go do it! You won't have any regrets! (I ordered the one with the 48 ounce container because my other blender has a large one, and it's hard to clean and get into especially if just making a small portion of something. The smaller one is great for a couple or a few people, or even a family if they want to break things into batches.)
Vitamix- QVC
Dry Grains Container- QVC
Vitamix
Dry Grains Container
Sunday, September 2, 2012
Cioppino

The first time I heard of Ciopinno, I was looking through (of all newspapers) the Wall Street Journal. Who knew that they had recipes in a business paper? I have no idea where that clipping is now, but this seafood soup is AMAZING. Beware, it is NOT cheap to make, so make sure you really like the people you are preparing it for. Below is my adaptation. I think I have made it differently every time, but always turns out great. Any combination of seafood can be used, as long as it ends up being a variety and a few pounds. I live in the Midwest, so the fresh seafood selection isn't always the best. I resorted to using all frozen, prepackaged items. As a matter of fact, the one thing I purchased "fresh" (2 pounds of mussels), all but 4 of them were dead and I couldn't use them. I was sooo upset. They are sitting in the fridge waiting to go back to Kroger. Serve this soup with crusty sour dough bread with butter (of course) and a Caesar salad (click here for a tasty Caesar salad dressing).
Ingredients:
- 1 yellow/white onion, chopped
- 1 red onion, chopped
- 4 cloves garlic, minced
- 1-2 tablespoons olive oil
- 1/2-1 teaspoon of red pepper flakes
- 1 bay leaf
- 1/2 can (3 ounces) tomato paste
- 2 cans (29 ounces total) diced tomatoes
- 1 quart seafood stock (or whatever stock you have available)
- 1 1/2 cups of white wine
- 1 can of clams, reserve juice for broth (not sure of the ounces, but it was the standard sized Bumble Bee can)
- 1 can of crab meat, reserve juice for broth (not sure of the ounces, but it was the standard sized Bumble Bee can)
- 1 pound of mahi mahi or other sturdy white fish (Trader Joes sells a bag of mahi mahi already cut into chunks, very handy)
- 1 pound of calamari (sliced, if not already- leave tentacles whole)
- 1 pound of raw shrimp, de-veined and de-shelled
- 1 pound of scallops
In a large stock pot saute the onion and garlic in the olive oil for about 5-8 minutes over medium heat. Add the pepper flakes and the bay leaf and cook for another minute or so. Add the tomato paste, diced tomatoes, seafood stock, wine, clam juice and crab juice to the pan. Bring to a boil, cover and then let simmer for about 30 minutes. Rinse all the sea packaged sea food before adding to the soup. Bring the heat back up to medium and add the fish. Cook for about 5 minutes and then add the rest of the seafood. Cook for about 3-5 more minutes. Season with salt and pepper if necessary, and serve immediately. If there are leftovers, they do reheat well the next day.
Sunday, August 5, 2012
White Chicken Chili/Tortilla Soup
I'm not exactly sure what to call this...White Chicken Chili or Tortilla Soup. Whatever you want to call it, it's soupy deliciousness. Serve with cheese, sour cream and tortilla chips.
Ingredients:
Lightly coat the poblano peppers and jalapeno peppers with olive oil and roast in a 400 degree oven for 20 minutes. Turn occasionally so they do not burn. Once they are finished, remove the thin plastic like skin and seeds and then chop. In a large pan saute the onions and garlic with a tablespoon of olive oil until golden. Add the rest of the ingredients except for the cilantro, salt and pepper. Use your discretion when adding the spices, some people like cumin and others don't Cook over medium heat for 30 minutes. Add salt and pepper to taste and then the cilantro.
Tip:
If you like your soup to be more like a chili and thick puree one of the cans of beans to add to the mixture. It will thicken it up and make it slightly creamy.
Ingredients:
- 1 pound chicken, boiled and then diced
- 1 onion, chopped
- 2 cloves garlic, minced
- 2 jalapeno peppers
- 2 poblano peppers
- 6 cups chicken broth/stock
- 3 cans great northern beans, drained and rinsed
- 1 can diced tomatoes
- 1-2 teaspoons cumin, depending on your taste
- 1/4-1/2 teaspoon mexican oregano
- 1/8 teaspoon clove
- 1/4 cup chopped cilantro
- salt and pepper to taste
Lightly coat the poblano peppers and jalapeno peppers with olive oil and roast in a 400 degree oven for 20 minutes. Turn occasionally so they do not burn. Once they are finished, remove the thin plastic like skin and seeds and then chop. In a large pan saute the onions and garlic with a tablespoon of olive oil until golden. Add the rest of the ingredients except for the cilantro, salt and pepper. Use your discretion when adding the spices, some people like cumin and others don't Cook over medium heat for 30 minutes. Add salt and pepper to taste and then the cilantro.
Tip:
If you like your soup to be more like a chili and thick puree one of the cans of beans to add to the mixture. It will thicken it up and make it slightly creamy.
Cream of Mushroom Soup
This was my first try at making homemade cream of mushroom soup. The only prior experience I had with it was from a can, and that stuff is gross. I made this soup with homemade chicken stock and it tasted like marsala sauce. I don't know if it is supposed to taste like that, but I thought it was quite good.
Ingredients:
In a large pan add the broth, mushroom stems and garlic. Bring to a boil and then simmer for 15 minutes. In a frying pan add the butter and mushrooms. Cook over medium heat for about 10 minutes or until cooked down and tender. Add the flour and cook for 1-2 minutes, stirring occasionally making sure it doesn't burn. Add the wine and cook for another 1-2 minutes. Add this mixture to the broth and cook over medium heat for 10 minutes. Add the milk, half and half, parsley and salt and pepper to taste. Cook for 5 minutes over low heat, making sure it doesn't come to a boil. Serve with a nice thick slice of toasty bread.
Ingredients:
- 6 cups of chopped mushrooms, stems removed before chopping for the broth (I used a combination of Portabella, Crimini, Shitake and Oyster)
- 4 cups of broth/stock (chicken, vegetable...)
- 1 clove garlic minced
- 1/2 cup dry white wine or marsala wine
- 1/4 cup flour
- 3 tablespoons butter
- 1 cup whole milk
- 1/2 cup half and half or cream
- 1/4 cup chopped parsley
- salt and pepper to taste or red pepper flakes
In a large pan add the broth, mushroom stems and garlic. Bring to a boil and then simmer for 15 minutes. In a frying pan add the butter and mushrooms. Cook over medium heat for about 10 minutes or until cooked down and tender. Add the flour and cook for 1-2 minutes, stirring occasionally making sure it doesn't burn. Add the wine and cook for another 1-2 minutes. Add this mixture to the broth and cook over medium heat for 10 minutes. Add the milk, half and half, parsley and salt and pepper to taste. Cook for 5 minutes over low heat, making sure it doesn't come to a boil. Serve with a nice thick slice of toasty bread.
Tuesday, July 24, 2012
Encebollado de Pescado


Encebollado recipes anyone (Ecuadorian onion and tuna soup)? This is the next thing up on my list I would like to recreate. I had this in Cuenca, Ecuador. It only cost about $1.50 and was amazing.
UPDATE:
A friend from Ecuador sent me a recipe. Click here for a link.
Wednesday, July 11, 2012
Sushi Hirosuke- Encino, California
Awhile back my brother and I went to California for a friend's wedding. To save money and try some new things we purchased some restaurant gift certificates. One of those was for Sushi Hirosuke in Encino California (LA area). The place was relatively small and not super packed. The food was good, but the sushi was amazing. We tried the highly recommended "Oh My God Roll". It is easy to say that you'll probably utter the same words. It was huge and to date, the best sushi I've had. The fish literally melted in our mouths. I'm sure there is better out there (and more expensive), but for a Midwestern girl who has tried sushi from mediocre restaurants here and from nicer restaurants on both the East and West coasts- this place is at the top of my list. If you go, do try the "Oh My God Roll". You won't regret it at all. It's even better with a coupon!


Little Devils- Vegan

I made this recipe from the Sticky Fingers' Sweets cookbook. They are vegan and were a huge hit with the group of unsuspecting carnivores I was with at Lake Cumberland recently. I'll put up the recipe when I have an opportunity.
Cookies and Cream Cupcakes- Vegan

Mixed Vegetable Enchiladas

Ingredients:
- 1 onion diced
- 2 cloves garlic minced
- 1 large golden or red beet, peeled and diced into 1/4 inch chunks
- 1 large sweet potato, peeled and diced into 1/4 inch chunks
- 1 red pepper, diced
- 1/2 bunch kale chopped
- 1 cup dried black beans, soaked and then cooked (soak for about an hour and then cook until tender using several cups of water- drain excess)
- 2 teaspoons cumin
- 1/2 teaspoon Mexican oregano
- 1/2 teaspoon red pepper flakes
- 1-1 1/2 teaspoons salt
- Cheese (Regular or Vegan)
- Ancho Sauce, about 1/3 of the recipe with additional broth added to reach desired "Enchilada Sauce" consistency (Recipe)
- Tortillas (Recipe)
Saute the onion, garlic, beet and sweet potato until slightly tender. Add the red pepper and saute for 5 minutes more. Add the rest of the ingredients and cook for an additional 5 minutes. Fill the tortillas and place in a baking dish. Cover with the ancho sauce and then cover with cheese. Bake for 20-30 minutes, or until golden and bubbly, in a preheated 350 degree oven.
Tuesday, June 5, 2012
Polenta Lasagna With Mushrooms and Greens

My brother and sister-in-law made this recipe awhile back. I looked it up on the internet, but the recipe I adapted came from here (Fat Free Vegan Kitchen). I'm not sure who posted the original recipe since I found a lot of them, but I give credit where it's due. How I made the recipe is below...
Ingredients:
1 tray of polenta
- 6 cups of water or brother
- 2 cups of dry polenta/corn meal
- 4 tablespoons of olive oil
- salt to taste
Ingredients for filling and sauce:
- 1 tablespoon olive oil
- 1 large onion, chopped
- 4 cups quartered baby bella mushrooms
- 8 cloves garlic, minced
- 1 bunch collard greens or kale, ribs removed and chopped
- 2 teaspoon dried basil
- salt and pepper to taste
- 2 cups marinara sauce
- 1/2 cup pitted kalamata olives, chopped
- 1 cup extra-firm silken tofu
- 1 cup unsweetened soy milk
- 1 cup vegetable broth
- 2 tablespoons cashew butter
- 2 tablespoons tahini
- 2 teaspoons onion powder
- 3 tablespoons nutritional yeast
- 1 teaspoon salt
- 1/2 teaspoon pepper
- 4 teaspoons corn starch
Preheat oven to 375 degrees. Place the items bolded above in a blender and blend until smooth. Saute the onion, mushrooms and garlic in a pan with a tablespoon of olive oil. Add the greens and basil along with a 1/4 cup or so of water. Cover and cook until the greens are tender. Mix in the white sauce and cook for 5 minutes. Add salt and pepper to taste.
Assembly:
Cut the polenta in half to fit a smaller pan or into into 4 pieces to fit into 2 large loaf pans (this is what I used). Put a piece of the polenta on the bottom, layer on half of the marinara sauce, the white vegetable sauce, olives, another layer of polenta and then finish off with the rest of the marinara sauce. Cut the proportions in half for two pans. Bake for 30-35 minutes.
Vegan Carrot Cake with Coconut Icing (Ginger-Macadamia-Coconut-Carrot Cake)

This is from the book, Vegan With A Vengeance. I put my changes off to the side. It was really good, and people didn't even know it was vegan.
Cake Ingredients:
- 2 1/3 cups all-purpose flour
- 1 tablespoon baking powder
- 1 teaspoon baking soda
- 3/4 teaspoon salt
- 2 teaspoons cinnamon
- 1/2 teaspoon nutmeg
- 1 cup pineapple juice
- 1/2 cup canola oil
- 3/4 cup sugar
- 1/2 cup pure maple syrup (I used 1/4 cup maple syrup and 1/4 cup agave because maple syrup is really expensive.)
- 2 teaspoons vanilla extract
- 1 cup chopped macadamia nuts (I used 1/2 cup)
- 1/4 cup crystallized ginger, chopped (I used dried/sweetened ginger from Trader Joes that was un-crystallized and it work great)
- 1 cup unsweetened shredded coconut
- 2 cups carrots, grated (I used 3)
Preheat oven to 350 degrees and grease 2 8 or 9 inch cake pans. In a large bowl mix together dlour, baking powder, baking soda, salt and spices. In a separate bowl mix together the pineapple juice, oil, sugar, maple syrup and vanilla. Add the dry ingredients to the wet in batches. Fold in the rest of the ingredients. Divide the batter between the 2 pans and bake for 35-45 minutes. Cool completely before removing from pans and then frost with coconut icing (I didn't wait to remove the cakes from the pans before cooling and they stuck to the bottom, I guess parchment paper can be used to prevent sticking).
Coconut Icing Ingredients:
- 1/4 cup non-hydrogenated margarine (I used Spectrum Organic shortening and a touch of butter flavoring along with 2 tablespoons coconut oil)
- 1/4 cup coconut milk (I used about 1/3 cup)
- 1 teaspoon vanilla extract
- 2 cups confectioners' sugar (I used 2 1/2-3 cups)
- 1 cup unsweetened shredded coconut (I used about 1 1/2- 2 cups)
Cream the margarine or shortening/coconut oil until fluffy. Add the coconut milk and vanilla, mix until combined. Beat in the confectioners' sugar with an electric mixer until smooth (about 5 minutes). Fold in the coconut. Refrigerate for an hour before using, it makes it thicker. I added the coconut oil because I didn't think it had that strong of a coconut flavor, so I compensated with additional sugar to get the right consistency. Ice the cake and top with additional coconut if desired.
Tortillas (flour and corn)

I wanted to make enchiladas and bought a cheap pack of tortillas. After looking at the list of some 20 or so ingredients on the back, I decided to make my own with the ingredients below. Some of the motivation also came from me just going to a friend's place for dinner. She's Guatemalan and tortillas are a staple. She showed me how she made her corn tortillas using Maseca (a brand of corn meal mix) and her super authentic looking wood tortilla press. They were awesome and I think corn tortillas are delicious, but can fall apart too easily. Thus below...I think the gluten in the tortillas helps hold them together.
Ingredients:
- 2 cups all purpose flour
- 2 cups corn meal (mine was somewhat coarsely ground, local from Whole Foods)
- 2 1/2 teaspoons baking powder
- 1 1/2 teaspoons salt
- 3 tablespoons vegetable shortening (I used Spectrum Organic)
- 1 tablespoon lime juice
- 1 1/2- 1 3/4 cups water
Mix all ingredients into a ball. It should be somewhat soft, but still hold shape. Refrigerate for 30 minutes to an hour. Roll into balls (maybe about 1/4 cup, mine made between 16 and 18 tortillas). On a floured surface, roll into a circle using a rolling pin (or circle like shape). Or use a tortilla press and press into a circle. Cook on a heated griddle, about 1 minute per side. There should be some small brown spots where the tortilla was touching the griddle. To keep moist and hot while preparing all the tortilla. Place between two paper towels on a plate, with a second plate on top to hold in heat and moisture. These held together really well, I made Mixed Vegetable Enchiladas with them.
Wednesday, May 30, 2012
Post Punk Kitchen- Cashew Queso

This recipe is from the Post Punk Kitchen Web site (click here). The picture does this no justice. It's amazing and I think it tastes exactly like Mexican cheese dip, I don't see how someone would even know it's vegan.
Ingredients:
- 1 cup cashews, soaked in water for at least 2 hours or overnight (I soaked mine for half an hour, but I have a blender that is similar to a Vitamix)
- 2 cups vegetable broth
- 2 tablespoons white miso (I used brown miso)
- 2 teaspoons cornstarch or arrowroot
- 1 tablespoon olive oil
- 1 small yellow onion, diced
- 1 red bell pepper, diced
- 1 jalapeno pepper, seeded and sliced (keeps seeds if you want more heat)
- 3 cloves garlic
- 2 teaspoons ground cumin (I used whole and toasted them, they were ground when I blended the mixture)
- 1 teaspoon ground ancho pepper (or any mild ground red chili)
- 2 tablespoons nutritional yeast (optional)
- 1/4 teaspoon salt
- 1 tablespoon fresh lemon juice
Instructions:
Drain the cashews. In a blender or food processor, puree them with
vegetable broth, miso and cornstarch until very smooth. This could take
anywhere from 5 to 10 minutes depending on your device. Rub between your
fingers to test; slight graininess is okay, but try to get it as smooth
as possible.
In the meantime, preheat a 4 quart pot over medium heat. Saute onion,
red pepper, and jalapeno in oil with a pinch of salt until soft, about 7
minutes. Add the garlic and saute about a minute more.
Transfer vegetables to the blender where the cashew mixture is. Add
cumin, ancho, nutritional yeast and salt. Blend again until very smooth,
scraping down the sides of the blender with a spatula to make sure you
get everything.
Transfer mixture back to the pot. Whisking often, turn heat up to
medium until the queso comes to a slow rolling boil. Lower heat so that
it doesn’t burn and cook for about 20 minutes. Whisk often and check to
see that it’s thickening, if it’s not, then turn the heat up a bit. It
should become nicely thickened but velvetty and pourable.
Stir in the lemon juice at the end. If the queso seems too thick,
drizzle in a little water and whisk to desired consistency. Taste for
salt, spices and lemon juice and adjust as you like.
Serve hot!
Tuesday, May 29, 2012
Tomato Soup

I adapted this recipe from a the Jamie Oliver Food Revolution cook book.
Ingredients:
- 2-3 carrots diced
- 1 onion diced
- 1 jalapeno diced
- 1-2 stalks of celery diced (optional- I didn't use because I don't like celery)
- 2-3 cloves of garlic minced
- 5-6 vine ripened tomatoes with the vine
- 1 14 ounce can of tomatoes
- 32 ounces of vegetable broth
- 1/4-1/3 cup of freshly chopped basil or 1 tbsp. rehydrated in water
- 2-4 tablespoons of olive oil
- salt and pepper to taste
Saute the diced veggies in a pan for about 5 minutes with 1 tablespoon of the olive oil. Add the broth and bring to a boil. Reduce the heat, cover and cook for about 10 minutes. Add the tomatoes (with the vine) and the can of tomatoes, cover and cook for 5-10 more minutes. Add the soup to a blender (probably in batches) along with the basil, olive oil and salt and pepper. Blend until smooth. Add additional salt and pepper to taste. Serve with a cashew queso grilled "cheese" sandwich. Click here for that recipe.
Tuesday, May 22, 2012
Black Bean Soup

The reset is over and I'm freaking out. I've had a plan telling me exactly what to eat for the last three weeks, and now I have to do it myself! I craved Mexican food the whole time and thought I would make some vegetarian bean burritos, but as I was cooking the beans I decided to make soup instead. It had more veggies, so I thought it was a better idea.
Ingredients:
- 1/2 cup dried black beans (first soak for about 4-6 hours and change the water a few times, then cook for about 45 minutes in a few cups of water- adding more as needed)
- 1/4 onion diced (red or yellow)
- 1 clove garlic
- 2 carrots diced
- 1/2-1 jalapeno diced
- 1/4 red bell pepper diced
- 1/2 can diced tomatoes (with or without chilies- I used with)
- 1 bay leaf
- 1/2 teaspoon cumin
- 1 tablespoon miso paste
- 1/2 Bragg's liquid aminos
- water or veggie broth to add for desired soup consistency
After cooking the soaked beans until soft, add all of the veggies (raw or sauteed) along with the bay leaf and cumin (add water or broth to achieve desired consistency). Cook for an additional 30 minutes and then add the miso paste and liquid aminos. Make sure that the soup is not boiling when the miso is added. It will kill the good stuff in the miso. Serve with sliced avocado and salsa and maybe a few tortilla chips or a quesadilla. This probably equals about 1 serving.
Tuesday, May 1, 2012
Beachbody Ultimate Reset- 21 Days
For as long as I can remember I have always been tired throughout the day and I do not seem to have a lot of energy. I was cruising the internet recently and came across Beachbody's Ultimate Reset. I watched several videos on YouTube and read several reviews. Everyone was claiming it would do for me what I have always wanted- give me more energy and feel less tired. I took a leap of faith and decided to try it. It was pretty expensive but it is worth the money if it works and if not, the company offers a 30 day money back guarantee, which I will be sure to use if I'm not satisfied. Overall, this cleanse is going to be really expensive. It costs a couple hundred dollars to buy the kit and then you have to add in the cost of food. I'm going to keep track of the cost of food so that I can get an average cost per day and per meal. If the food item I need is offered in the organic section, that will be the product I purchase, if not I will purchase the conventional counterpart. The whole point of this cleanse is to reset my body and get all of the toxins out of my body, there is no need to add them during the process. That's why I'll go for organic if the store has it. I'll post pictures of some of my meals and give my opinion on them and tell how I feel during the process. I'm not getting a blood test to check cholesterol and sugar like several of the reviewers did that I read about. I'm positive this cleanse will lower mine, even though I doubt they are high or bad since I do have a fairly balanced diet. I'm going to record my beginning and ending weight and judge based on that result along with how I feel mentally and physically before and after. I will begin on May 2, 2012...more to come.


Conclusion: I followed the meal plan "almost" exactly. It did introduce some items into my diet that I was not accustomed to eating, and I plan to keep most of those items. I enjoyed eating an animal free diet, I thought I was going to stick to a vegetarian diet after, but Chipotle has been the death of me. Not really, but it has drawn me in a few times. I don't think I eat that much meat, so I'm not too concerned. I don't eat fast food or much pre-prepared food so I don't eat that much processed food. Overall, I didn't feel a huge change. I lost 3-4 pounds over the cleanse, I was thinking I would lose more but that's not what this was about. I was still tired during the day, but I think that is because as Americans we have sedentary lives. I sit at a desk several days a week working on a computer. The other days I have a lot of activities, but am not necessarily that active. What I think this cleanse helped me to learn, is to eat more veggies. I thought I ate a lot, but I was wrong. I think it also helped me learn that I'm not as toxic as I thought I was. I do tend to eat mostly organic/natural items and try to limit the amount of animal products I eat. I was expecting more from the cleanse. I believe it works, just better on people who lead lifestyles that are more unhealthy than mine. If you're drawing the last straw, then give the cleanse a whirl. You never know, it may be what you need to jump start your system. Just be prepared to drop about $700. Three weeks of food was about $475 and the kit is a little over $200. I think exercise was the answer I was looking for, so I bought the rowing machine I've wanted for the past 5 years. It has been less than a week and I'm already feeling a huge difference (Concept II).
Note:
The system comes with a variety of supplements to take that help with detoxing and other things... it's not just about the food. I don't have recipes for the items, just pictures and descriptions of some of the meals that the reset has to offer.
Day 1- Beginning of Phase 1
The system comes with a variety of supplements to take that help with detoxing and other things... it's not just about the food. I don't have recipes for the items, just pictures and descriptions of some of the meals that the reset has to offer.
Day 1- Beginning of Phase 1
Breakfast: Whole grain toast, eggs and steamed kale
Lunch: Salad
Dinner: Baked salmon, steamed asparagus and baby potatoes
Thoughts: Everything was great except for the kale, that was hard for me to eat. I wasn't hungry during the day and drank lots of water along with the supplement.

Day 2
Breakfast: Oatmeal, blueberries and plain yogurt
Lunch: Greek Salad
Dinner: Black beans and rice, corn, salsa, guacamole, kale and a tortilla
Thoughts: Same as day one...no problems at all

Day 4
Dinner: Stir fried vegetables with quinoa and cucumber and tomato salad
Thoughts: The meals are pretty huge, I could barely finish my lunch. The dinner was really good, I really like the stir fried vegetables- really tasty. Again, I was not hungry during the day at all.

Day 6
Breakfast: Whole grain toast, baked tempeh, avocado and kale
Thoughts: The pine nuts on the kale made it tolerable. I thought it would be weird eating tempeh for breakfast, but it went really well with the avocado.
See dinner below

Dinner: Roasted root medley (beets, carrots, sweet potatoes and onions), zucchini cashew soup and toasted millet.
Thoughts: This has been the best meal by far, everything was really good. I never really like beets, but this recipe made me change my mind. The cashews made the soup creamy, as if it contained dairy. All that it was made of was zucchini, cashews and some herbs. I think I am noticing some increased energy levels.

Day 8- Beginning of Phase 2
Breakfast: Fruit Plate
Lunch: Salad and avocado
Snack: Carrot and avocado (although I did not eat it this day, but a day or two later)
Dinner: Pinto beans and rice, steamed zucchini and string beans
Thoughts: I thought it would be hard cutting meat out of my diet, even though I do not eat it often, but it has been easier than I thought. The addition of Bragg's Liquid Aminos adds smokiness that I think I mentally associate with meat. They were in the beans, and it tasted similar to bacon being in them. Feeling better, but I haven't really noticed a change in my skin yet. Maybe that is to come.

Day 10
Thoughts: I broke the rules today and took ibuprofen. I had a terrible headache that made me feel nauseous and that wouldn't go away with heat. There is nothing like laying awake for a few hours in the middle of the night with a throbbing head. I'm not sure what caused it. I did go for a short hike, but I don't see why that would cause a headache. I just told myself I would try not to take any more over the rest of the reset.
Day 11
Dinner: Hearty vegetable miso soup and steamed swiss chard (I added pine nuts so that I could eat the swiss chard)
Thoughts: So far so good. I haven't had many issues with hunger during the day. I have had a snack or two since the beginning- but only the ones that are suggested in the manual. I am feeling more alert a little less tired. I've been researching vegan cookbooks, yes some of them have recipes that are bad for me (Veganomicon, Sticky Fingers, Vegan with a Vengeance, Vegan Cookies Invade Your Cookie Jar, and some others.). I got a few from the library and they look good enough to buy. So far Veganomicon and Vegan Cookies Invade Your Cookies Jar. I'm waiting for the rest of the list to come in at the library. This is making me consider more and more having a vegetarian/vegan diet. I'll just have to wait and see.

Day 12
Dinner: Roasted beets, coconut collard greens and quinoa.
Thoughts: No complaints. I have been feeling more hungry during the day, but I think that is because I'm nearing the end of phase 2 and the grains are being phased out. Phase 3 only has optional grains for dinner, but it is suggested to cut those out completely during the last phase. I felt pretty good today, not too sleepy. I'm still waiting for the acne on my chin to clear up. I should probably ditch the makeup to help that along.

Day #... I lost track of what I ate and when. Some pictures and food descriptions below...
 |
| Stir-fry and coconut collard greens. |
 |
| Veggies and grains along with kale. Not so bad. |
 |
| Curry cauliflower, brown rice and kale. The cauliflower was awesome. |
 | ||
| Fennel...this was pretty disgusting and really hard to eat. I could barely chew it and it was so tough. |
 |
| Roasted beets, greens and tempeh. Not so bad. |
 | |||
| Dinner day 21. This soup was absolutely DISGUSTING!!! If anyone ever suggests cucumber and avocado soup...run the other way. I tried to drink it but could not make myself swallow. The rest of the food was good though. I saved the terrible soup and mixed it into smoothies for a few days after, so as to not waste food. |
Southwest Corn Chowder
This turned out to be really good, especially a couple of days after. My inspiration came from a corn chowder that was available at Whole Foods in the ready to eat section. It smelled really good, but was expensive, so I decided to make my own. As always, I suggest to use organic ingredients if possible.
Ingredients:
Fry bacon until it is crispy and golden brown. Remove from pan to drain on a towel- crumble. Leave the bacon grease in the pan and saute the onion, garlic and jalapeno until soft (5-6 minutes). Add the corn, potatoes, tomatoes, chicken broth and bay leaf. Bring to a low boil and cook until the potatoes are cooked through (30-45 minutes). Add the milk, cumin and chicken. Simmer for 10-15 more minutes. Season to taste with salt and pepper or pepper flakes for added heat. Serve with crumbled bacon, sour cream, salsa, guacamole and chips.
Ingredients:
- 2 16 oz bags of frozen corn
- 4 medium sized potatoes- diced small
- 1 medium/large yellow onion- diced small
- 2 cloves garlic- minced
- 3 jalapenos- chopped (I wanted to use poblano, but they were not available when I needed them)
- 1 can diced tomatoes- drained
- 1 32 ounce container chicken stock/broth
- 2-3 cups of milk (I used 2%)
- 1/2-1 tsp of cumin powder
- 1 bay leaf
- 6 slices of bacon
- 4 cooked chicken tenderloins- diced (sauteed, grilled, boiled or however is preferred)
Fry bacon until it is crispy and golden brown. Remove from pan to drain on a towel- crumble. Leave the bacon grease in the pan and saute the onion, garlic and jalapeno until soft (5-6 minutes). Add the corn, potatoes, tomatoes, chicken broth and bay leaf. Bring to a low boil and cook until the potatoes are cooked through (30-45 minutes). Add the milk, cumin and chicken. Simmer for 10-15 more minutes. Season to taste with salt and pepper or pepper flakes for added heat. Serve with crumbled bacon, sour cream, salsa, guacamole and chips.
Thursday, March 22, 2012
Chocolate and Peanut Butter Brownie Duo

Wednesday, March 21, 2012
Peanut Butter Chip Brownies with Peanut Butter Ganache Icing

These were some of the best peanut butter brownies I've had. I made them with creamy peanut butter, but I think they would probably turn out well if made with chunky peanut butter.
Ingredients:
- 2 sticks melted butter (or any combo of butter and coconut oil)
- 1 3/4 cups sugar
- 1 1/2 cups peanut butter
- 3 eggs
- 2 teaspoons vanilla
- 2 1/2 cups flour
- 1-1 1/2 cups peanut butter chips (The only brand I could find was Reese's)
- 1/2 teaspoon salt
Beat the eggs for about 1 minute, add the sugar and beat for about 1 more minute. Beat in the butter, peanut butter and vanilla. Add the rest of the ingredients and stir until combined. Put in a parchment lined 8 inch pan (I used a round pan). Bake for 45-55 minutes in a 350 degree oven. Just keep an eye on the brownies after 40 minutes, ovens can vary and I was baking two pans of brownies at the same time. If you test the brownies, the knife should have some brownie on it, it shouldn't come out dry. Remove from the oven when complete and let cool. The parchment allows for easy removal from the pan. I find this helpful since my brownies always stick. Once cool, top with Peanut Butter Ganache below.
Peanut Butter Ganache Ingredients:
- 1 cup heavy whipping cream
- 1 cup peanut butter chips
- 1 tablespoon coconut oil
Heat the cream on the stove top until it starts to boil. Be careful not to scorch/burn the cream. Put the peanut butter chips in a glass bowl along with the coconut oil and pour the hot cream on top. Allow to sit for a few minutes and then stir until smooth. Allow to cool and then pour 1/2 of the recipe over the brownies. Or cool completely (refrigerate) the ganache and then beat with a mixer to have a less dense frosting. Use the other half of the ganache for another recipe (peanut butter and chocolate brownies) or cut the recipe in half.
Island Paradise Muffins

This past weekend my sister-in-law brought over some really ripe bananas to make some banana bread. Low and behold, she left them without making the bread. I decided to make them Sunday morning and take her some in the afternoon. I had a pineapple sitting on the counter and thought, hmmm.... banana pineapple muffins. I thought some more and decided banana pineapple coconut nut muffins would be even better. I was going to call them that on here, with that very original name, but my sister-in-law insisted on calling them Island Paradise Muffins because that's what they remind her of. It doesn't take much to convince me. They were really popular and I'll be making a second batch tomorrow. So here they are.
Ingredients:
- 3 eggs
- 1/2 cup sugar
- 6 tablespoons melted butter
- 2 tablespoons melted coconut oil (or any combo of the two)
- 3 super ripe bananas (mushed)
- 1 cup fresh pineapple chopped/diced
- 1 teaspoon vanilla
- 2 cups flour
- 1/2-3/4 cup unsweetened shredded/sliced coconut
- 1 1/2 teaspoons baking powder
- 1/2 teaspoon baking soda
- 1/2 teaspoon salt
- 1/2 cup chopped pecans
- 1/2 teaspoon cinnamon
In a bowl mix the first 7 ingredients until combined. In a second bowl (or if you're lazy like me, on top of the liquids) mix the rest of the ingredients. Combine the wet and the dry ingredients until incorporated. Put the batter into a greased bread pan or muffin pan. It should make one normal sized loaf or about 18 muffins. Bake in a preheated 350 degree oven for 30-40 minutes. Let cool for about 10 minutes and then remove from the pan.
Thursday, March 15, 2012
Experimental Sourdough Starter
This idea was a flop...I don't know if it was because of the flour or if because I used vinegar and that there wasn't enough sugar to make a fermented dough. I may try it again and add sugar. I'll post an update if I do.
For several weeks now I have been considering buying s starter for sourdough. The frugal person inside of me was fighting back though because some of those starters cost around $15. It seems way too expensive for me. So, the other night I was looking up how to make a sourdough starter. This web site called The Fresh Loaf suggested using flour and pineapple or orange juice. I thought that this was interesting, because I thought that starters were generally just flour, water and maybe some sugar. I decided I would give it a try but I discovered that I had no pineapple or orange juice in the house. I contemplated for awhile and decided I would try to make a starter using flour and vinegar. I'm basically following the steps of the above mentioned site to feed the starter, but I'm just going to try a different liquid. I'll see how it goes...
Ingredients Day One (3/13/12):
- 2 tablespoons organic whole wheat flour (whoops, I accidentally used organic all purpose flour...I'll just have to wait and see how things turn out)
- 2 tablespoons Bragg's raw organic apple cider vinegar
Ingredients Day Two (3/14/12):
- 2 tablespoons organic whole wheat flour (whoops, I accidentally used organic all purpose flour...I'll just have to wait and see how things turn out)
- 2 tablespoons Bragg's Raw Organic Apple Cider Vinegar
Before adding the flour and vinegar on day three...It looks like starter

- 2 tablespoons organic whole wheat flour (whoops, I accidentally used organic all purpose flour...I'll just have to wait and see how things turn out)
- 2 tablespoons Bragg's Raw Organic Apple Cider Vinegar
Chocolate Chunk Brownies with Chocolate Ganache Frosting

I adapted this recipe from Alton Brown's Cocoa Brownies. There are probably enough differences that he doesn't need to be mentioned, but Alton Brown is probably my favorite cook out there. He points out the science behind the food making process and that is awesome.
Brownie Ingredients:
- 4 eggs
- 1 cup sugar*
- 1 cup brown sugar*
- 8 ounces melted butter
- 1 1/2 cups cocoa
- 2 teaspoons vanilla extract
- 1/2 cup flour
- 1/2 teaspoon salt
- 1/2-1 tablespoon instant coffee
- 1/2-3/4 cup of chocolate chips
Directions:
Beat the eggs for about 1 minute, add the sugar and beat for about 1 more minute. Add the rest of the ingredients and stir until combined. Put in a parchment lined 8 inch pan (I used a round pan). Bake for 45-55 minutes in a 325 degree oven. Just keeping an eye on the brownies after 40 minutes, ovens can vary and I was baking two pans of brownies at the same time. If you test the brownies, the knife should have some brownie on it, it shouldn't come out dry. Remove from the oven when complete and let cool. The parchment allows for easy removal from the pan. I find this helpful since my brownies always stick. Once cool, top with Chocolate Ganache below.
Chocolate Ganache Ingredients:
- 1 cup heavy whipping cream
- 1 cup chocolate chips (not milk chocolate, use semisweet- dark)
- 1 tablespoon coconut oil
Heat the cream on the stove top until it starts to boil. Be careful not to scorch/burn the cream. Put the chocolate chips in a glass bowl along with the coconut oil and pour the hot cream on top. Allow to sit for a few minutes and then stir until smooth. Allow to cool and then pour 1/2 of the recipe over the brownies. Or cool completely (refrigerate) the ganache and then beat with a mixer to have a less dense frosting. Use the other half of the ganache for another recipe (peanut butter and chocolate brownies) or cut the recipe in half.
Friday, February 24, 2012
Apple Crisp Pie

Ingredients:
5 Granny Smith apples, peeled and sliced (I used organic)
4 Gala apples, peeled and sliced (I used organic)
1/4-1/2 cup sugar
2 tablespoon. cornstarch
1 tablespoon lemon juice
1 teaspoon vanilla
1/2-1 teaspoon cinnamon
1/8 teaspoon nutmeg
1 pie crust ( I cheated and used a pre-made crust, but when I'm not feeling lazy I use Crisco's recipe of Crisco, flour, salt and cold water)
Crisp topping:
1 cup oatmeal
1/2-3/4 cup brown sugar
1/2 cup flour
1/2 teaspoon cinnamon
1/2 cup butter
1/2 teaspoon vanilla
1/4-1/2 cup nuts (I used pecans)
Directions:
Mix all of the ingredients together for the pie and pour into the prepared crust (This is enough for a deep dish pie- I lined the pan with parchment paper so I could take the pie out). In a separate bowl, mix all of the ingredients together for the crisp. The mixture should be somewhat crumbly. Put the crisp mixture on top of the pie and bake in a preheated 375 degree oven for 40-45 minutes, or until golden brown. I'll be posting later how I actually finished and served the pie. A popular crazy cake idea made the wheels in my head start spinning. I hope it turns out, I'll found out in a day if it did.
Tuesday, February 7, 2012
Kombucha Continuous Brew System Supplies and Directions


After a lot of research, I decided to start brewing Kombucha and jump right in with a continuous brewing system. There are some places that sell kits for a couple of hundred dollars but I didn't want to spend that much money. I figured I could do it myself for a more reasonable price. If you're a person who would rather buy the kit, because it is a lot easier- go for it. I like trying to do things myself if possible and I prefer to save my money. I found this website that is really cool called Cultures for Health. If you subscribe to their email list, you can get a PDF book about how to make Kombucha, how to brew it safely and how to setup the different brewing systems. It has really helped me in this process.
Supplies:
- ($29.00 + tax) 1 lead free ceramic water dispenser. I purchased a PRIMO one from Wal-Mart, even though I strongly dislike the store, because it was the cheapest and because it came with a stand. I did my research on PRIMO's website and this container is lead free. The PDF book says to use caution with ceramic containers because sometimes lead paints are used.
- ($3.00) 1 fish tank thermometer to monitor the temperature of the Kombucha. Keep between 70 and 80 degrees.
- High thread count fabric (napkins or t-shirts) and two extra wide large rubber bands. These items are used to cover the jar and keep the fabric in place. Put one of the rubber bands around the mouth of the container, place the fabric over top and then use the other rubber band to secure the fabric in place. This will keep bugs, dust and potentially bad things out of the Kombucha.
- ($4.00) 1 SCOBY and SCOBY starter. See how I made one on my home page.
- ($10-$15) Tea base. One cup of sugar for every gallon of tea. This container holds about 2 gallons plus the SCOBY starter. I bought a couple of bags of 365 brand organic sugar (cheaper to buy multiple smaller bags than the large bag) and a couple of boxes of Twinings Organic Breakfast blend and Green tea from Whole Foods.
- ($4.00) PH strips. Kombucha is supposed to have a PH level between 2.5 and 4. This level is not supposed to let harmful bacteria grow.

Cover and leave to sit for a week or a two. The longer it sits, the less sweet it is. Check the PH levels before bottling or drinking, just to be safe. I transferred my SCOBY to a continuous system on a Friday and I checked the PH on the next Monday (3 days later) and the PH was 3.2. It tasted pretty good but I decided to wait longer so it would be less sweet and have more probiotics. I'll just have to wait and see.


UPDATE:
February 24, 2012...The Kombucha brewing is going well. I've been bottling it for a couple of weeks now and experimenting with some flavorings (ginger, blueberry, lemon, raspberry and peach). I bought several bags of the berries and peach from the organic frozen section in the store and I picked up some organic lemons and ginger from Whole Foods. I figured if I'm using organic tea and sugar, that I might as well go all of the way and do it all organic. I blended up the fruit in our immersion blender and I froze them in small cubes in a little silicone ice cube tray. This makes the frozen fruit super easy to pop out. I am storing them in the deep freezer we have in some mason jars and some glass Honest Tea bottles (I forgot to take pictures of those, I'll post them another time). I have noticed that the more my SCOBY grows, the fizzier the Kombucha is. Also, adding fruits and ginger (and sometimes a bit of sugar- 1/8 tsp when bottling) makes it a bit fizzier too. It's nowhere near as fizzy as the GT's Kombucha from the store, but it tastes pretty stinken good. Back to the brewing...I get about 7 16 ounce bottles out of a batch. So I do a new batch every week. I've been bottling and brewing on Sundays. I fill up the bottles and then add more tea (about 1.5 gallons of water, 15 mixed tea bags from above and two cups of sugar- brew, bring to room temperature, add to the dispenser and cover) to replace what I removed. I let it sit for a week and then start the process over. I have been testing the Kombucha's PH once a week before I brew just to be safe. It is pretty consistent and is always around 3.0-3.2. I do burp the glass bottles every couple of days just to be sure they don't explode and I don't refrigerate the bottles. I thought that I would, but I like drinking it at room temperature. So far, so good. A family member said the SCOBY looks like a scab, but that hasn't deterred her from starting to drink it on a daily basis. Below are pictures of the fruit that I have been using to flavor the Kombucha. I'm not a fan of raspberry by itself, I actually dumped that bottle out. I like plain, ginger and blueberry the best. I tried peach and ginger together, but the ginger overpowered the peach. Next time, I will put in less ginger to see if I can taste the fruit I mix it with better.


The final setup.
Subscribe to:
Comments (Atom)